
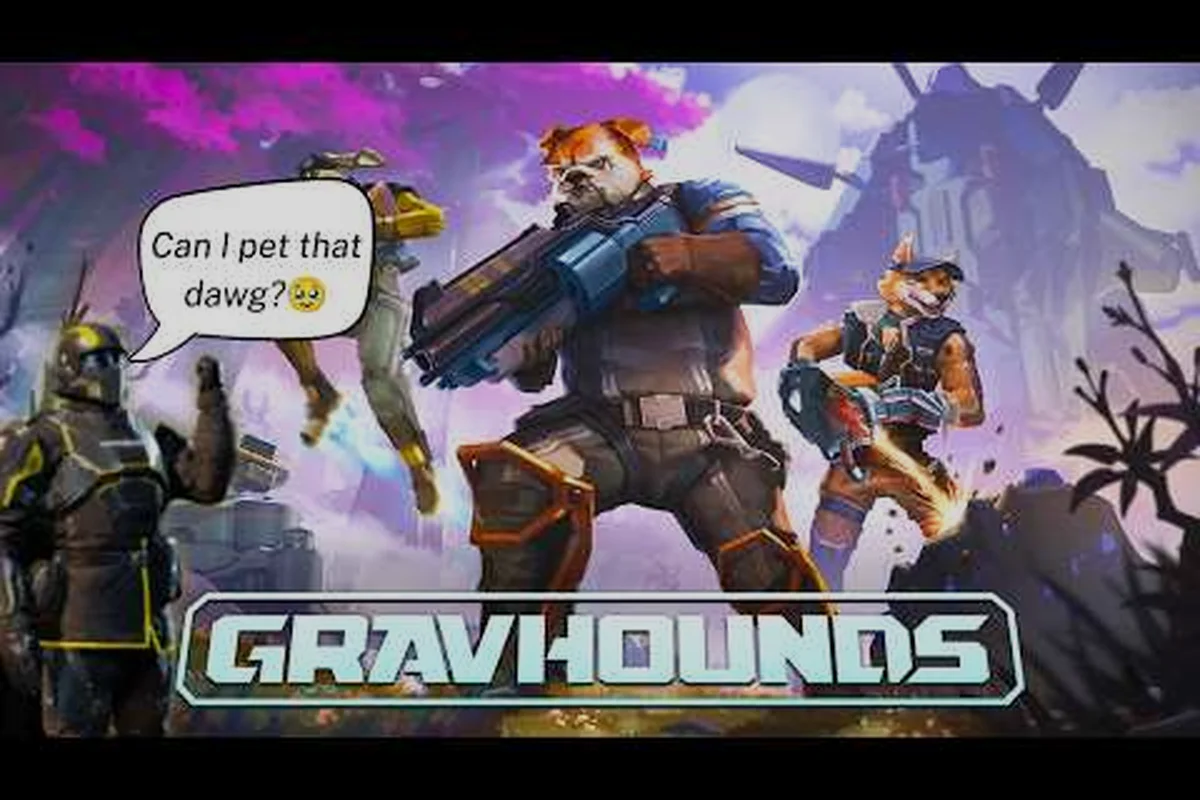
Selene brings disciplined ranged pressure to GRAVHOUNDS, making this selene gravhounds guide useful for players who want safer positioning, stronger zone control, and dependable team support. Learn how her missions, turret placement, and Grav Beam work together, then adapt the setup for solo runs or a four-player operation.
Selene Missions and Role Overview
Selene is a GRAVHOUNDS operative built around controlled ranged combat and area denial. Her value is not simply the damage she can deal from across the map; it is the space she creates for teammates. A well-placed turret and a steady Grav Beam can divide an arena into safe movement lanes and dangerous zones, allowing a team to enter from only one predictable direction.
This selene gravhounds guide focuses on the decisions that determine whether those tools create an advantage or merely announce your position too early. The central rule is simple: establish the fight before the target needs it. Place useful devices, preserve a firing lane, and make the enemy commit before committing your own crew.
Selene’s Core Combat Loop
A reliable Selene cycle depends on converting each stage into a controlled exchange: first use terrain and sightlines to narrow the enemy’s approach, then establish turret coverage, maintain Grav Beam pressure, and break contact before close-range opponents erase Selene’s positional advantage. For example, if the turret covers a corridor and Grav Beam pulls targets into that lane, the team can focus one enemy without leaving Selene exposed; if the enemy closes too early, repositioning preserves both ammunition and the chance to reset the engagement.
-
Scout the engagement area and identify a defensible side.
-
Place a turret where it can cover a route without blocking extraction.
-
Apply ranged pressure with Grav Beam when the target enters a predictable lane.
-
Reposition or extract before the enemy closes the distance.
| Combat priority | Selene action | Practical result |
|---|---|---|
| First contact | Select a narrow firing lane | Forces targets to move through a known area |
| Zone control | Place a turret near a choke point | Punishes enemies entering from one side |
| Target focus | Maintain Grav Beam pressure | Supports a coordinated team push |
| Weak point | Allow enemies to close distance | Reduces Selene’s ranged advantage |
| Retreat | Break contact and rotate | Preserves equipment and mission progress |
The important distinction is that Grav Beam is a positioning tool as well as an attack. A shot that lands before the team is ready can scatter enemies unpredictably, while a shot used after a turret forces movement can guide them into the next phase of the encounter.
What Makes Selene Different in a Team
Selene does not need to occupy the front line, but she still needs a deliberate position. Her ideal operating area is elevated, unobstructed, and close enough to support allies without sharing the exact ground they are defending. Placing yourself behind the whole team can be useful, but a position directly beside a turret can make the device harder to defend.
| Team size | Selene position | Primary duty |
|---|---|---|
| Solo | Elevated side of the arena | Maintain distance and control a retreat lane |
| Two players | Offset from the front fighter | Cover the teammate’s flank |
| Three players | Near the turret but with a clear escape | Enable focused objective pushes |
| Four players | Behind the main engagement line | Coordinate area denial and revival timing |
When comparing characters, remember that there is no single answer to the gravhounds best gravhound question. Dozer can absorb pressure, Zane can shape the battlefield, and Finn can provide mobility. Selene earns her place by turning terrain into a repeatable damage pattern. The complete GRAVHOUNDS roster overview can help you compare those roles before committing to a squad.
Selene Team Setup for 1–4 Player Drops
The strongest Selene team setup is not based on stacking the same support tools. It is based on dividing responsibilities so that one player creates space, another controls movement, and Selene converts both effects into damage. This remains important whether the drop is a tense solo contract or a coordinated four-player operation.
Solo Configuration
In a solo run, protection and information matter more than maximum burst. Selene needs a location where she can monitor multiple approaches without being trapped between them. Place the turret near the objective or the most likely path the target will take, but keep enough room to sidestep an attack rather than standing directly beside the device.
| Solo priority | Setup choice | Reason |
|---|---|---|
| Positioning | Use height and lane control | Preserves the range advantage |
| Turret angle | Cover an approach, not the entire room | Prevents enemies from surrounding it |
| Combat timing | Fire after the enemy commits | Improves Grav Beam consistency |
| Escape route | Maintain one unobstructed path | Prevents the arena from becoming a trap |
A solo player should treat the turret as a tool for shaping the enemy route, not as a substitute for personal mobility. If the team can simply walk around the defense, it does not qualify as a solid turret placement.
Two-Player Configuration
With two players, Selene should cover the teammate who is willing to enter the contested space. The partner can draw attention or tackle a target directly while Selene supports from the side. Avoid standing in a straight line behind that player, because a single forward push can expose both of you to the same incoming attack.
A practical arrangement is to keep Selene offset from her partner’s firing lane rather than directly behind them. For example, if the partner pushes a central lane, Selene can anchor a turret on the side flank, using its aim assist and area coverage to punish enemies crossing the flank while leaving the partner room to disengage. This spacing prevents a single forward push from stacking both players in the same danger zone and gives the team two viable angles of attack.
-
Partner: mobile pressure and close-range engagement
-
Selene: turret placement, flank control, and ranged support
-
Shared rule: both players maintain separate extraction routes
The GRAVHOUNDS teamwork guide expands on communication patterns that prevent two players from converging on the same point and overextending. For Selene, that means assigning roles before a push: the partner calls out the target and engages at close range while Selene anchors a turret on the opposite flank, then rotates that turret only after the partner has created space. This lets both players preserve separate extraction routes and avoids stacking their damage, crowd-control opportunities, and incoming fire into one narrow lane.
Three- and Four-Player Configuration
Larger teams can assign Selene a clearer area-control role. One player can secure the objective, another can protect Selene’s turret, and the remaining players can rotate for objectives or clean up enemies entering from a secondary route. The key is not to make Selene permanently responsible for defense; that responsibility drains her usefulness as a mobile damage dealer.
| Drop size | Suggested formation | Selene’s task |
|---|---|---|
| Three players | Triangle with Selene on the outer point | Cover the longest approach |
| Four players | Split push and hold | Protect the central push and rear flank |
| Objective-heavy team | One player on objective, two on pressure, one on support | Maintain turret access |
| Fast extraction team | Compact advance with Selene trailing | Mark threats during the retreat |
In coordinated play, the turret becomes more important because it protects the team’s slower decisions. If the group must loot, search containers, or revive a teammate, the device can discourage enemies from entering the open space around the objective. The important rule is defend the action window, not merely the object itself.
Grav Beam, Turrets, and Positioning Tactics
Selene’s equipment only reaches its potential when the user controls when and where the fight happens. This section covers the relationship between her signature weapon, her deployable turret, and the lanes she should preserve. More details on weapon behavior can be found in the Grav Beam mechanics reference.
Using Grav Beam Effectively
Grav Beam is most valuable when the battlefield is already partially shaped. If the target has one practical route, a beam can threaten that route and prevent a free approach. If the target has several equally good exits, the same attack may only buy a few seconds.
| Situation | Beam timing | Better tactical choice |
|---|---|---|
| Target entering a lane | Wait until the route is committed | Punish a predictable path |
| Target circling the arena | Hold briefly, then redirect | Close an escape route |
| Front ally under pressure | Support the ally’s push | Focus the same target |
| Enemy attacking the turret | Target the attacker | Protect the team’s setup |
| No useful angle | Reposition instead of firing blindly | Preserve time and mobility |
Players should treat beam shots as part of a sequence. The turret can restrict one approach, the beam can pressure a second, and the team can then move through the remaining opening. Firing randomly from long range breaks that sequence and gives enemies time to identify Selene’s exact position.
Choosing Turret Locations
A good turret location is visible enough to threaten enemies but not so exposed that a single defender can disable it. The best location usually controls an approach used by multiple enemies and sits beyond the team’s immediate defensive bubble.
Turret placement checklist:
-
Covers a doorway, corridor, slope, or objective edge
-
Forces the target to pass through a narrow lane
-
Remains accessible without crossing the open battlefield
-
Does not obstruct Selene’s own line of fire
-
Can be reached by an ally if enemies pressure it
-
Leaves the squad with at least one alternate extraction path
| Placement | Strength | Weakness |
|---|---|---|
| Beside the objective | Defends the active interaction point | Easy to bypass if it covers too little |
| Behind the team | Offers early warning | May miss flanking enemies |
| Across a choke point | Creates a controlled approach | Can be surrounded if undefended |
| Near an extraction lane | Protects the escape route | Does little during forward pushes |
| On elevated ground | Improves visibility and coverage | Can leave Selene exposed |
Offense-defense balance is the key phrase. Place the turret where enemies must notice it, but not where every enemy can fire on it from multiple angles. A turret that gets destroyed after ten seconds has not created a lane; it has only revealed the squad’s plan.
Comparing Selene, Zane, Dozer, and Finn
Character comparison is important because Selene’s best tactics depend on what her teammates bring. A ranged control operative can dominate one composition and become redundant in another. Looking at Zane, Dozer, and Finn makes the strategic differences clearer without claiming that one character is always best.
Zane Versus Selene
Zane’s role appears to center on battlefield disruption, while Selene’s strongest identity is sustained ranged pressure. They can work together when Zane changes enemy positions and Selene controls a lane. A full zane gravhounds guide should therefore be evaluated in terms of team synergy, not only solo clear speed.
| Consideration | Selene | Zane |
|---|---|---|
| Primary advantage | Range and lane control | Battlefield disruption |
| Best location | Elevated or lateral support position | Position with space to affect multiple enemies |
| Main team need | Reliable ranged pressure | Area control that creates openings |
| Weakness when crowded | Vulnerable at close range | Needs room to position effectively |
| Synergy | Punishes routes shaped by disruption | Creates targets for Selene’s beam |
Dozer Versus Selene
Dozer naturally fits the durable front-line role, allowing Selene to protect the team from a safer position. In that pairing, the turret should cover the ground beside or behind Dozer rather than the exact point where he is fighting. This prevents enemies from collapsing on the front line without triggering the turret.
| Consideration | Selene | Dozer |
|---|---|---|
| Role | Ranged control and support | Durable close-range anchor |
| Preferred spacing | Offset from the front line | Near the center of enemy attention |
| Main combo | Beam pressure behind a durable push | Hold position while Selene controls approaches |
| Risk | Isolation if the front line breaks | Overextension if support falls behind |
Finn Versus Selene
Finn offers speed and repositioning, which can complement Selene by rapidly collecting objectives or reaching another side of the fight. The combination is especially useful when the team needs to prevent enemies from escaping through multiple lanes. A finn gravhounds guide is most useful when it explains how mobility can create Selene’s firing opportunities.
| Consideration | Selene | Finn |
|---|---|---|
| Role | Ranged area denial | Mobile objective pressure |
| Core strength | Predictable firing lanes | Fast repositioning |
| Best pairing use | Hold one side while Finn contests another | Draw attention from an escape route |
| Main risk | Stale positioning | Arriving without support coverage |
The gravhounds best gravhound choice ultimately depends on the mission and team composition. Selene is especially valuable when the squad needs controlled lanes, ranged pressure, and a defensive anchor that does not require close contact. For broader role comparisons, the roster reference can help determine whether her kit complements the rest of the lineup.
Missions, Unlocks, and Progression Preparation
Selene’s equipment is most effective when players arrive at a mission prepared with the necessary tools and know which side of the map they intend to control. Progression also determines when players can freely compare characters, so understanding the unlock process can prevent unnecessary early mistakes.
Preparing Before the Drop
Before accepting a contract, check the available mission area, objective count, and expected routes. Then decide what Selene’s job will be: guarding an extraction point, supporting an objective push, or controlling a path into the arena. A clear purpose produces better turret placement and cleaner Grav Beam timing.
| Preparation step | Result |
|---|---|
| Review the mission area | Identifies likely choke points |
| Decide Selene’s team role | Prevents overlapping support roles |
| Check available equipment | Prevents relying on an unavailable defense |
| Plan extraction lanes | Keeps retreat possible |
| Establish a callout plan | Reduces accidental friendly fire and confusion |
A resources and materials overview can help players plan what to carry and what to leave behind. The point is not to maximize every category. Selene needs enough durability to reposition, enough tools to support a push, and a clear extraction route when the encounter stops going according to plan.
Learning Character Unlocks
Players often search for how to unlock gravhounds because access determines which team compositions can be tested. A practical gravhounds unlock guide should focus on the sequence of obtaining access, trying a character in low-risk situations, and learning the squad’s communication system before attempting harder contracts.
| Progression goal | Practical action |
|---|---|
| Test a new GRAVHOUND | Use a low-risk mission first |
| Understand the squad kit | Review each operative’s role before deployment |
| Improve consistency | Practice one defense and one fallback route |
| Compare characters fairly | Keep mission and team size constant |
| Prepare for harder drops | Prioritize extraction and equipment recovery |
The supplied dependency data does not include a verified unlock checklist, mission count, currency cost, or character-level requirement. Those details should therefore be confirmed in-game rather than presented as fixed facts. If a character remains locked, the safest route is to continue completing available contracts, collect progression resources, and check the in-game roster panel for the current requirement.
Practice Routine for Better Selects
Selects improve when players practice one decision at a time. First, spend a few runs focusing only on turret angles. Next, practice firing Grav Beam after the enemy commits to a lane. Finally, test how long the squad can hold the position before extraction. This staged approach makes weak habits easier to identify.
Community reports often frame Selene as a character who rewards patience, but that only holds when her positioning plan is deliberate. The practical measure is whether each engagement gives the team a better exit. If a fight ends because the squad was trapped, the issue may be preparation rather than damage output.
Practical Selene Mission Scenarios
A guide becomes more useful when it explains what to do in recognizable situations. These scenarios cover common patterns that should reveal whether Selene’s team setup is functioning. They are tactical frameworks rather than claims about specific mission layouts.
Holding an Objective
When the squad needs time to interact with an objective, place the turret where attackers must pass to reach it. Selene should remain close enough to support the interaction but avoid standing between the device and the objective, where a quick advance could cut her off from both.
Objective-hold sequence:
-
Identify the most likely attack direction.
-
Place the turret to cover that approach.
-
Hold a lateral firing lane behind the squad.
-
Defend the interaction without chasing every target.
-
Extract through the secondary route after completion.
The turret should make the objective team feel less isolated. If enemies can simply walk around the defense without consequence, reposition it rather than adding unnecessary attacks. For example, if the squad is capturing a relay and opponents can circle behind the cover, shift the turret to cover that flank while Selene maintains a lateral firing lane. A misplaced turret may deal damage yet still fail the hold, because attackers can bypass it, interrupt the objective interaction, or separate Selene from the team.
Rotating After an Extraction
Sometimes a contract ends with the squad moving while enemies remain nearby. Selene can cover the rotation by placing a temporary turret at the old position, then using Grav Beam against pursuers from the next cover point. This creates a two-stage defense without requiring the entire squad to stop.
| Rotation stage | Selene action | Team action |
|---|---|---|
| Departure | Plant or leave a turret covering the old area | Begin moving without overextending |
| Mid-route | Apply beam pressure to committed pursuers | Keep the center together |
| New cover | Secure a new lane | Repair or recover in relative safety |
| Final approach | Disarm the defense if needed | Enter the extraction zone together |
Handling an Enemy Flank
A flank is most dangerous when Selene ignores it because she is focused on a central target. Rotate the beam, not the entire squad, when possible. The turret can maintain pressure on the original lane, while Selene’s attention prevents enemies from reaching the team’s rear.
If the flank has become a close-range threat, prioritize displacement and escape rather than a long-range contest. Selene’s strongest contribution is often preventing enemies from reaching the vulnerable part of the squad, not winning every exchange by herself.
Building Confidence Through Repetition
The best preparation comes from repeating a reliable sequence under moderate pressure. Players can improve their ability to read entrances, preserve optional routes, and support teammates without excessive voice-command clutter. These habits turn Selene’s equipment from situational tools into a repeatable combat system.
Frequently Asked Questions
Is Selene the best GRAVHOUND for beginners?
Selene can be approachable because ranged attacks let new players observe engagements before entering close combat. However, she still requires deliberate turret placement and escape planning. A cautious player who enjoys controlling lanes may enjoy her kit, while someone seeking effortless frontline durability may prefer a different operative.
Should Selene place her turret beside the team?
Not usually. A turret beside the team may defend one approach, but enemies can attack it without exposing themselves. Placing it across a likely approach usually creates a better kill zone, provided one teammate can protect the device and another route remains available for retreat.
When should Selene use Grav Beam?
Use Grav Beam when the target has committed to a route, when the team needs to focus a dangerous enemy, or when firing can close an escape lane. Avoid firing simply because the target is visible. A useful shot should either force movement, protect an ally, or prepare the next stage of the team push.
Does Selene work well in solo missions?
Yes, but her setup should emphasize control and mobility. Use one turret to shape a primary route, keep a secondary escape path, and avoid standing where enemies can surround the device and player together. Her ranged pressure is strongest when the arena allows her to dictate where combat occurs.
How can players compare Selene with Zane, Dozer, and Finn?
Keep the mission and team size consistent, then track which role improved the result: area control, durability, mobility, or ranged pressure. Selene excels when the squad benefits from safe lane control; Zane, Dozer, and Finn can make better fits when disruption, close-range endurance, or rapid repositioning matters more.