
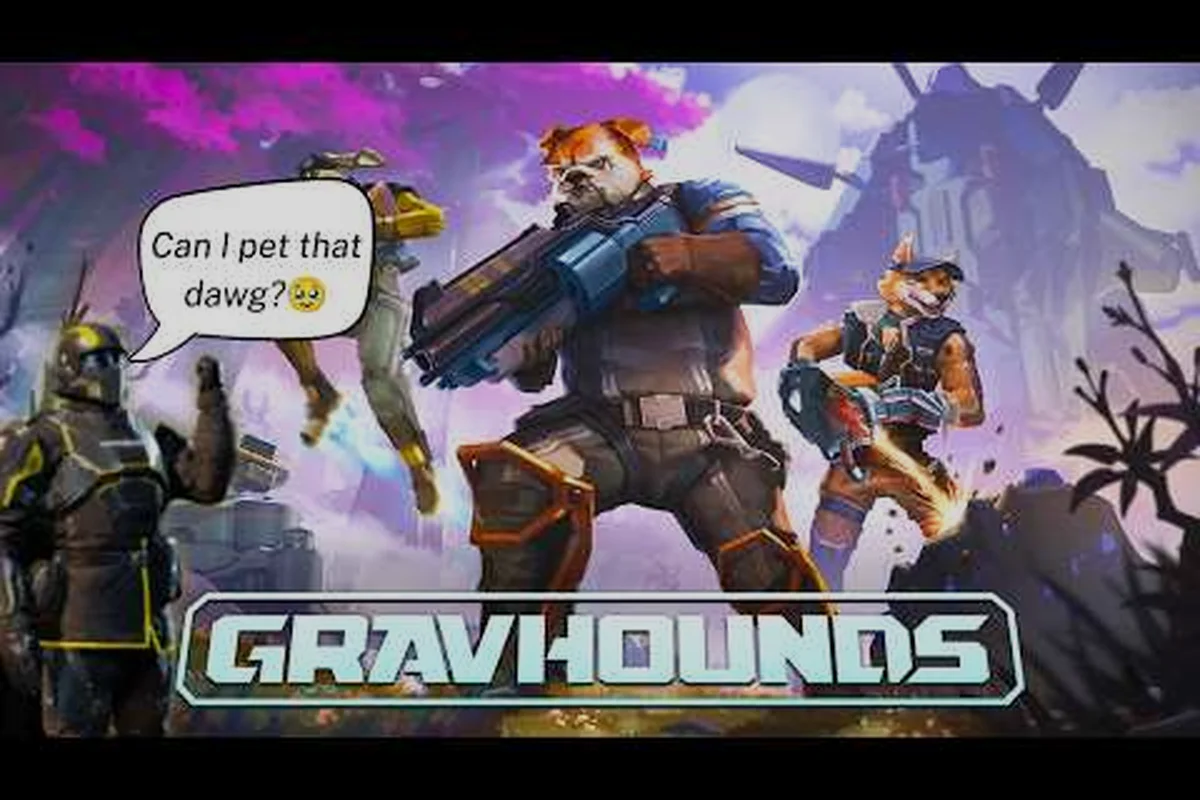
Picking the best gravhound for co op is less about raw damage and more about how a bio-engineered canine crew stacks its strengths across a four-player drop. Because the pack is the core unit, a squad that duplicates roles stalls fast when the swarm escalates.
This breakdown compares co-op roles, solo fallbacks, and beginner-safe picks so you can build a squad that actually finishes the extract. Get the role math right before your next shift, and the loot loop stops feeling like a scramble.
What Makes a Gravhound Strong in Co Op
Co-op value in GRAVHOUNDS comes from three overlapping traits: how a hound handles the Grav Beam physics combat, how it supports base construction, and how it survives the extract-with-the-loot sprint. The official Steam page frames each hound as a specialized worker rather than a lone hero, which means a single overpowered pick rarely carries a team.
The most useful way to judge a pick is by what it frees the rest of the squad to do. A hound that pins enemies lets your builder finish turret-and-pipeline base construction without interruption. A hound that clears trash mobs lets your heavy hitter save cooldowns for the swarm's escalation spikes. That division of labor is the whole game.
Community reports from early playtests consistently flag role overlap as the top reason squads wipe. Two hounds built for the same job leave a gap somewhere else, and the gap is usually defense during the mid-shift upgrade window — the stretch where builders are routing resources into turret-and-pipeline upgrades and nobody is holding the swarm lanes. A squad running two burst-damage hounds, for example, deletes elite spawns quickly but folds once escalation sends sustained trash waves at an undefended pipeline; the missing crowd-control pick is what the wipe actually traces back to. That is why the co-op trait table below is worth reading as a gap checklist rather than a tier list: each row names the weakness your squad inherits when that role is absent, so you can spot the hole before the extract sprint exposes it.
| Co-op Trait | Why It Matters | Weakness If Missing |
|---|---|---|
| Crowd control | Holds swarm lanes during base building | Builders get interrupted, turrets fall behind |
| Burst damage | Deletes elite spawns before they reach pipelines | Escalation overwhelms fixed defenses |
| Sustain/support | Keeps the squad alive through long shifts | Forced retreats cost loot and time |
| Mobility | Reaches downed allies and far objectives | Extract phase turns into a rescue scramble |
| Utility | Speeds resource routing and upgrades | Slower mid-shift power spikes |
The takeaway is simple: the best gravhound for co op is the one that covers a gap your squad would otherwise feel, not the one with the biggest number on a stat screen. Read the trait table as a live roster check — if your builder is running a dedicated crowd-control hound, a burst-damage pick frees them to finish turret-and-pipeline upgrades instead of babysitting swarm lanes, and a mobility hound then covers the extract-with-the-loot sprint that burst damage can't. Pick the role nobody on your squad has claimed, and re-check that gap after every mid-shift power spike.
Best Gravhound for Co Op: Role-by-Role Picks
Rather than crowning one hound, it helps to assign each squad slot a job and pick the hound that does that job cleanly. The table below maps the four standard co-op roles to the traits that make them work, based on how the official gameplay overview presents the drop loop.
| Squad Role | Core Job | Ideal Traits | Pairs Well With |
|---|---|---|---|
| Anchor / Tank | Holds lanes, draws aggro | High durability, taunt-style control | Builder, burst DPS |
| Builder / Engineer | Turrets, pipelines, upgrades | Construction speed, resource routing | Anchor, support |
| Burst DPS | Kills elites and swarm spikes | High single-target damage, cooldown burst | Anchor, mobility |
| Support / Flex | Heals, revives, fills gaps | Sustain, mobility, utility | Any role |
The Anchor is the least glamorous pick and the most important one in a four-player drop. Without a hound that can hold a lane while the builder lays pipelines, the base never stabilizes, and the swarm reaches your core before the first mid-shift upgrade lands.
The Builder role is where co-op squads quietly win or lose. Construction speed compounds: faster turrets mean earlier coverage, which means more time to farm resources for the next upgrade tier. A squad that skips a dedicated builder usually spends the second half of a shift repairing instead of expanding.
Burst DPS exists to solve the escalation problem. As protection demands and objective pressure climb, elite spawns show up faster than fixed defenses can handle. A hound with a strong cooldown burst deletes those threats before they touch the pipeline network.
The Support / Flex slot is the squad's safety net, and it should be filled last once the anchor, builder, and burst DPS are locked in. Its job is to absorb everything the fixed roles can't: covering revives when the anchor goes down mid-wave, patching healing gaps between upgrade tiers, and rotating into whichever lane is buckling. Because this hound rarely holds a dedicated position, prioritize sustain and mobility traits over raw damage — a flex pick that can reach a collapsing pipeline in time is worth more than one that kills slightly faster. In practice, a single flexible player on support lets the other three commit fully to their roles instead of splitting attention, which is exactly why the table lists it as pairing well with any role.
Best Gravhound for Solo Play and Why It Differs
Solo changes the math entirely. Without teammates, you cannot split crowd control from damage from building, so the best gravhound for solo is whichever pick compresses the most jobs into one kit. Self-sufficiency beats specialization every time. Concretely, that means valuing a hound that can pin a lane with a slow or root, absorb chip damage while you lay foundations, and still disengage on its own mobility cooldown — rather than a high-burst pick that shreds enemies only when a partner is holding aggro. In co-op you can afford a specialist because a teammate covers its gaps; in solo, every dead ability slot is a job nobody is doing, so a single missed crowd-control window can cost you the base or the extract.
The solo checklist looks different from the co-op one: where a co-op draft can spend a slot on a pure support hound because a partner covers its damage gap, the solo list weights every entry toward self-sufficiency — a lane-holding crowd-control ability, enough sustain to eat chip damage during a build phase, and a mobility cooldown short enough to reset an extract run without a teammate's peel. That is why a hound that tops co-op tier lists as a force multiplier can fall several ranks the moment you queue alone.
-
Survivability first — no one is coming to revive you, so sustain and durability outrank glass-cannon damage.
-
Built-in crowd control — a hound that slows or pins enemies can defend its own base while you build.
-
Fast base setup — construction speed matters more solo because you have no dedicated builder.
-
Escape tools — mobility decides whether the extract phase is a clean exit or a death run.
-
Forgiving cooldowns — long cooldowns punish solo players who cannot rotate abilities with a partner.
According to community reports, solo players lean toward hounds that can hold a lane and still contribute to base defense, because splitting attention between fighting and building is the core solo challenge. A pick that needs a partner to function is a trap in solo queues.
If you are still mapping out where to farm safely alone, the GRAVHOUNDS planet resources guide breaks down which planets suit a solo hound and which demand a full squad. Treat that breakdown as your filter before committing to a solo main: a hound whose kit only shines when a partner is drawing aggro will underperform on the low-pressure farming planets you'll be grinding for upgrade materials, while a self-sufficient lane-holder can clear those same routes and bank resources without waiting on a co-op group to form. Cross-check each candidate against the planet list so your solo pick is one you can actually level on the worlds you can reach alone.
Best Gravhound for Beginners: Low-Risk Starter Picks
New players should prioritize forgiveness over ceiling. The best gravhound for beginners is one with simple ability timing, solid baseline durability, and a role that teaches the core loop without punishing mistakes. You learn the extract-with-the-loot rhythm fastest when your hound does not demand precise cooldown juggling.
| Beginner Priority | What to Look For | Why It Helps New Players |
|---|---|---|
| Simple kit | Few conditional abilities | Less to track during swarm pressure |
| Durability | High health or damage reduction | Survives early positioning mistakes |
| Clear role | Obvious job in a squad | Teammates know how to play around you |
| Cheap upgrades | Low early upgrade cost | Faster feedback on the upgrade system |
| Forgiving cooldowns | Short or passive effects | No dead windows during fights |
Start with a hound that has a clear, readable job. Anchor-style picks are ideal first choices because they teach lane management and positioning, which transfer to every other role later. Builder picks are a strong second because construction is the backbone of every successful shift.
Avoid starting on burst DPS hounds. They reward precise timing and punish missed windows, and a beginner who cannot land the burst contributes less than a steady anchor would. Once you understand swarm pacing and the mid-shift upgrade flow, the DPS picks open up.
For a deeper look at how each hound ranks against the others, the GRAVHOUNDS role tier list sorts strongest and weakest picks with the reasoning behind each placement. Read it with the beginner priorities above in mind rather than treating it as a flat ranking: a hound sitting mid-tier for raw output can still be the smarter first pick if its kit has few conditional abilities and its upgrades stay cheap early, because that combination shortens the feedback loop on the mid-shift upgrade flow. Cross-reference the tier list's role notes against the durability and cooldown columns, then confirm your shortlist in a low-stakes shift before committing upgrade currency — that two-step check catches anchor-style picks that look unremarkable on paper but teach lane management cleanly.
Building a Four-Player Squad That Actually Works
A four-player squad should cover all four roles with zero overlap. The cleanest composition pairs one anchor, one builder, one burst DPS, and one flex pick. That spread handles swarm escalation, base construction, elite spawns, and emergencies without anyone doubling up.
The Balanced Core
The balanced core is the safest default for players still learning the co-op flow. Anchor holds the front, builder lays turrets and pipelines, burst DPS deletes elites, and flex rotates wherever pressure spikes. This composition forgives one weak link because the flex slot can compensate.
The Aggressive Variant
Aggressive squads swap the flex slot for a second DPS hound and lean on faster clears to outpace escalation. This works only when the anchor is durable enough to solo-hold a lane and the builder is efficient enough to keep turret coverage ahead of the swarm. It is a higher-skill composition that punishes sloppy positioning.
The Fortress Variant
Fortress squads run two anchors and a builder, with a single DPS pick for elite cleanup. This trades clear speed for near-unbreakable base defense, which suits players who prefer steady resource farming over risky pushes. The tradeoff is slower escalation handling, so the DPS player carries more pressure.
| Composition | Anchor | Builder | DPS | Flex | Best For |
|---|---|---|---|---|---|
| Balanced Core | 1 | 1 | 1 | 1 | Most squads, mixed skill |
| Aggressive | 1 | 1 | 2 | 0 | Experienced, fast clears |
| Fortress | 2 | 1 | 1 | 0 | Farming, defensive play |
Whichever variant you run, the mid-shift upgrade window is where squads pull ahead. Teams that stack bonuses and reshape loadouts during that window adapt to the swarm's escalation without restarting the run, per the official Steam page. Plan your upgrade priorities before the shift starts so the window is not wasted on debate.
New Gravhounds, Upcoming Gravhounds, and Future Gravhounds
The roster is still moving. GRAVHOUNDS launched into Early Access, and the developer's official Discord is the primary channel for squad-focused feedback that shapes balance changes. That means the current co-op meta is a snapshot, not a permanent ranking.
Here is how to think about roster churn: treat every tier list as dated the moment a patch ships. When a balance pass nerfs a hound's anchor sustain or buffs a builder's turret uptime, the job it fills doesn't vanish — only the hound occupying it does, so your four-job coverage (anchor, builder, DPS, flex) stays valid while specific picks rotate out. Watch the official Discord patch notes for ability cooldown and damage-number changes rather than tier shifts; a single cooldown reduction on a flex hound's crowd-control tool can move it from situational to core without any ranking update. That is why a squad built around jobs absorbs roster churn in a way a must-pick composition never can.
-
New gravhounds arriving in patches can shift role coverage, especially if a new pick compresses two jobs into one kit.
-
Upcoming gravhounds teased by the developer usually fill gaps the community has flagged, so watch which roles feel thin.
-
Future gravhounds will likely push the meta toward more specialized roles as the roster widens and overlap becomes easier to avoid.
For now, build your squad around role coverage rather than a single must-pick hound. A composition that covers anchor, builder, DPS, and flex survives roster changes because it is defined by jobs, not names. When a new hound drops, ask which of the four jobs it does best and whether it frees a teammate to cover something else.
The GRAVHOUNDS loadout guide is worth reading alongside roster updates, since weapon progression and hound abilities interact more than most players expect during the escalation phase. Concretely, a hound whose kit leans on sustained anchor pressure pairs poorly with a low-mobility weapon build, while a builder-focused hound gets far more value from loadout perks that shorten turret redeploy time. Treat the guide as a second axis for your four-job coverage: when a patch adjusts a flex hound's crowd-control cooldown, re-check whether your weapon choices still let that hound reach its ability breakpoints before the escalation phase ramps, rather than swapping the hound outright.
How to Test a Co Op Pick Before Committing
Do not commit to a hound based on a stat sheet. Test it in a real drop with a real squad, and judge it on three measurable outcomes: how long your base survives, how many elites reach the pipeline network, and how clean your extract is.
A practical testing routine: run the candidate hound through a full shift on the map you actually farm, not a tutorial run, and log three numbers — base HP at the first elite wave, count of elites that reach the pipeline network, and seconds from extract call to wheels-up. Then swap only that hound for your current co op pick and rerun the identical shift; if the base holds longer and fewer elites breach the pipeline, the swap is a real upgrade rather than a stat-sheet illusion. Keep the squad's other three slots fixed so Gravhound abilities, not loadout drift, explain the delta.
-
Run one shift with the candidate hound in its intended role and note where the squad struggles.
-
Swap only that hound and rerun the same shift to isolate the difference.
-
Track whether the base stabilizes earlier or later than before.
-
Watch the extract phase — a hound that cannot disengage cleanly is a liability regardless of damage.
-
Confirm the pick still works after a mid-shift upgrade reshuffles your loadout.
The official GRAVHOUNDS on Steam page and the official GRAVHOUNDS website remain the canonical sources for platform and service claims, so check them before assuming a hound behaves the same across PC and Xbox. Cross-platform multiplayer means squad compositions can mix platforms, and behavior should stay consistent.
Frequently Asked Questions
What is the best gravhound for co op overall?
There is no single winner, but an anchor-style hound is the safest first pick because it holds lanes while your builder establishes turret coverage. Squads that skip a dedicated anchor tend to lose their base during the mid-shift escalation window, which costs far more than a slightly slower clear.
Is the best gravhound for solo the same as the co-op pick?
No. Solo play rewards self-sufficiency, so the best gravhound for solo compresses crowd control, durability, and building into one kit. Co-op picks can specialize because teammates cover the gaps, which is why a pure support hound shines in a squad but struggles alone.
Which gravhound should beginners pick first?
Beginners should start with a durable, simple-kit hound that has an obvious squad role. Anchor picks teach positioning and lane management, which transfer to every other role. Avoid burst DPS hounds early, since they punish missed cooldown windows that new players are still learning to time.
Will new gravhounds change the co-op meta?
Likely yes. New gravhounds that compress two roles into one kit would let squads drop a specialist slot, and upcoming gravhounds usually target roles the community flags as thin. Build around role coverage rather than specific names so roster changes do not break your composition.
How many players can join a GRAVHOUNDS co-op squad?
The official Xbox Game Preview listing describes online co-op for 2-4 players with cross-platform multiplayer and shared/split screen support. Four-player squads can cover all four core roles, while smaller groups should prioritize anchor and builder first, then fill damage and flex as slots open up.
Final Thoughts on Squad Building
The best gravhound for co op is the one that completes your squad's role coverage, not the one with the flashiest damage numbers. Anchor, builder, burst DPS, and flex form the backbone of every reliable composition, and the mid-shift upgrade window is where disciplined teams pull ahead of disorganized ones.
Start with a forgiving pick if you are new, test candidates in real drops rather than on paper, and revisit your lineup whenever new gravhounds or upcoming gravhounds reshape the roster. Role coverage survives balance patches; flavor-of-the-month picks do not.