
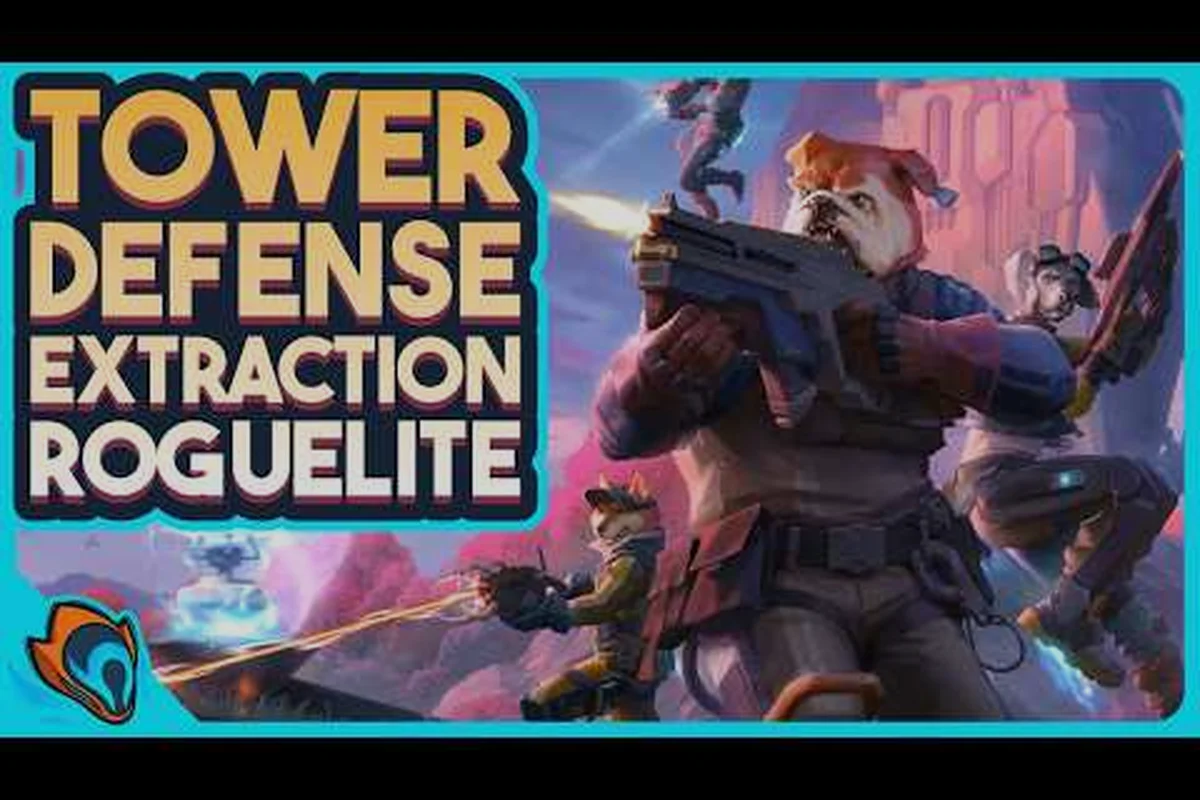
Learning what to do first in GRAVHOUNDS is essential because early decisions determine whether you extract safely, recover useful gear, and return with the resources needed for your next run. These five priorities will help you establish a dependable loop from the moment you land.
GRAVHOUNDS What to Do First: Build a Reliable Run
A strong opening begins before you reach your destination. Players who rush directly toward valuables often discover that extraction requires more preparation than they expected, so your first task is to understand the basic run cycle and the decisions that support repeated success.
The Run Cycle connects landing, looting, surviving, and extraction. Those stages matter because a technically successful scavenger can still lose everything by lingering after the most valuable items are secured. For a wider overview of the game’s progression and terminology, see the GRAVHOUNDS beginner guide.
| Priority | Immediate Goal | Why It Matters | Beginner Action |
|---|---|---|---|
| Confirm your route | Know where you will land | It reduces wandering and exposure | Review the map before deploying |
| Secure essentials | Cover basic needs | Resources support later decisions | Prioritize dependable supplies |
| Locate an exit | Set an extraction target | You cannot keep gear without it | Identify the route early |
| Watch the clock | Leave before pressure peaks | Delays increase the cost of mistakes | Set a personal cutoff |
| Bank the result | Return and reinvest | Progress depends on useful loot | Improve the next loadout |
Start With a Job You Understand
Your first priority is to establish what the current run is trying to accomplish. A job provides direction, which is more valuable than wandering across a wide area and reacting to every object encountered. Players should learn the required objective, the possible destination, and the point at which completing the task becomes less valuable than leaving safely.
A Focused Landing prevents the common mistake of collecting random objects without understanding whether they support the job. Before committing to a route, consider whether your destination requires travel across exposed ground, whether the objective can be completed quickly, and whether your available supplies can cover the return journey.
| Run Goal | Main Benefit | Main Risk | Best Early Approach |
|---|---|---|---|
| Complete a job | Earn a direct objective reward | Reaching the required location | Use the shortest practical route |
| Collect basic gear | Improve early survivability | Carrying more valuable items | Replace rather than accumulate |
| Gather materials | Support construction or upgrades | Slower searches | Choose common materials first |
| Explore | Learn routes and landmarks | Extended exposure | Set a short exploration limit |
| Extract immediately | Protect current equipment | Missing rewards | Use after a difficult route |
Set a Three-Part Plan
Before deploying, decide where you will land, where you will spend your search time, and where you will leave. This does not require a perfect map knowledge or a rigid schedule. It simply prevents the most common early mistake: entering a run without an exit plan and improvising only after danger appears.
The Decision Deadline is the moment when you stop collecting and begin moving toward safety. It can be based on elapsed time, job progress, inventory value, nearby danger, or a combination of those factors. What matters is that the deadline is recognized before panic makes the decision for you.
Use a Simple Opening Checklist
A useful routine keeps early decision-making consistent. Check your route, choose one main objective, identify an extraction path, and carry only what improves your chances of returning. This foundation is more valuable than memorizing a complicated sequence of actions because every run can present different risks.
The Basic Supply Kit should support movement, recovery, and a safe exit. Pack space has a cost because every additional item creates more value to lose, so beginners should favor a small number of dependable supplies over a crowded inventory. This is one of the most useful gravhounds tips and tricks: travel light until you know the route well.
GRAVHOUNDS Beginner Tips for Finding Useful Gear
Your first equipment choices should solve immediate problems rather than chase rare combinations. Search in order of usefulness, because a basic item that improves survival can make the difference between extracting and returning empty-handed. This is particularly important in the available demo, where each decision shapes the rest of your run.
Begin by checking what your character already carries and what the surrounding area can provide. Replace weak gear instead of collecting every piece you encounter, and keep upgrades focused on a clear benefit such as improved movement, greater carrying capacity, or stronger protection. The GRAVHOUNDS demo walkthrough can help you connect these choices to jobs and extraction.
Evaluate Items by Their Job
Every item should have a purpose. A weapon that handles your current threats may be more useful than a nominally stronger item with an inconvenient requirement, while a larger backpack can expose you to additional losses if it encourages you to remain in dangerous locations. Compare function before comparing appearance.
| Item Role | What It Improves | Good First Choice | Common Mistake |
|---|---|---|---|
| Weapon | Damage and threat control | Reliable general-purpose tool | Swapping for marginal upgrades |
| Protection | Survival during encounters | Balanced defense | Carrying several weak pieces |
| Storage | Number of items carried | Modest capacity increase | Filling every open slot |
| Movement | Travel time and positioning | Clear, noticeable benefit | Ignoring the effect of weight |
| Recovery | Returning from damage | A practical healing option | Hoarding one-use supplies |
Read the Environment Before the Loot
The best loot is rarely located in an obvious, exposed room. Look for signs of recent activity, blocked paths, abandoned positions, and areas that offer cover. If a location has already been heavily disturbed, moving on may save more time than searching for a replacement item. The Value Threshold is the point when additional loot no longer justifies the extra exposure.
Player reports consistently recommend comparing an item’s practical benefit with its distance from the exit. A modest upgrade near the route home can be wiser than a stronger find across the map. Because map conditions and available drops can change between versions, treat these as community-tested priorities rather than fixed drop rates.
Favor Predictable Improvements
A predictable upgrade helps you learn the controls, map, and danger patterns. Early gear should therefore offer an obvious advantage with little required knowledge. This avoids the complexity of equipment effects that you cannot properly use while enemies are approaching. The Reliable Starter Loadout remains more valuable than an impressive collection of items with unclear benefits.
| Evaluation Question | Positive Answer | Practical Result |
|---|---|---|
| Does it solve a current problem? | Yes | It improves the next stage of the run |
| Can I use it under pressure? | Yes | It supports decisions in a fight |
| Does it change my route? | No | It remains manageable while moving |
| Is its value worth the risk? | Yes | Its position does not demand a detour |
| Will it still help if I extract soon? | Yes | It reduces wasted search time |
Improve One Piece at a Time
Changing the entire loadout at once makes it difficult to identify which decision improved the result. Upgrade one category, compare it with the previous setup, and keep the change only if it supports your usual route. This incremental approach turns the demo into a learning environment rather than a sequence of random replacements.
The One-Variable Test can reveal whether a new item offers meaningful value. Compare travel time, recovery, or encounter handling with and without it. The results may seem modest, but they help prevent a recurring early-game mistake: spending more time evaluating equipment than actually using it.
GRAVHOUNDS Demo Guide for Jobs and Extraction
The demo centers the learning experience around a clear gameplay loop. That means landing with limited knowledge, finding a job, collecting what the situation requires, and returning through a viable extraction route. A complete gravhounds demo guide should therefore cover both the reward objective and the route away from danger.
For the full gravhounds demo walkthrough approach, treat each attempt as a rehearsal. Choose a smaller goal on the first run, observe how the landscape channels movement, and record where you spent time without gaining anything. On the next run, change one part of that route and compare the result.
Learn the Extraction Route Before the Destination
Extraction knowledge changes how you evaluate everything else. If you know the shortest safe path out, you can reject a marginal detour more easily. If you do not know the route, valuable discoveries can create a dangerous temptation to keep searching. The Escape Route should become your second objective after confirming the job itself.
| Planning Stage | Key Question | Why It Prevents Problems |
|---|---|---|
| Before deployment | Where is the practical exit? | Establishes the maximum search distance |
| After landing | Which route reaches it fastest? | Reduces unnecessary cross-country travel |
| After looting | Is the return path still secure? | Accounts for changing threats |
| Under pressure | What can be abandoned? | Clarifies priorities when time is short |
| Near extraction | Is the reward worth one more detour? | Stops greed-driven route changes |
Complete the Objective, Then Reassess
Jobs usually provide a more predictable reward path than unguided searching. Complete the required task when possible, then assess whether the remaining opportunity justifies the risk. If you already have enough for the next upgrade, extraction may offer more value than another fight or a distant search.
The Objective Completion Check uses three simple conditions: the task is done, the required items are secured, and the route remains manageable. When all three are true, leaving is usually a sound decision. If one is false, identify the missing condition rather than continuing to browse without a plan.
Practice Losing Less, Not Just Finding More
A successful run can include fewer items if those items survive. Watch for warning signs such as repeated encounters near the same route, a steadily shrinking supply of recovery items, or a pack containing more value than you can comfortably protect. These signals mean the run is becoming less efficient, even if each individual find remains tempting.
A Controlled Extraction happens when you leave with a useful result and enough time to reach safety. Set a limit based on how much time has passed, how difficult the route looks, and how many consumables remain. The exact limit can change, but deciding before exhaustion makes the process more consistent.
Learn Through Repeated Short Runs
The demo is especially useful for testing a simple routine. Complete a modest job, extract, and then alter one component on the next attempt. Test a different landing point, carry fewer valuables, or choose a nearer exit. Small controlled changes reveal reliable improvements faster than changing every decision simultaneously.
The Three-Run Cycle gives you a simple way to refine the approach. Use the first run to learn, the second to correct the largest issue, and the third to repeat the improved route. This method turns the available content into practical training rather than a single attempt at maximum reward.
GRAVHOUNDS Tips and Tricks for Defending Your Position
Defense matters because every minute spent at a location gives threats more opportunities to appear. Your objective is not necessarily to hold one position indefinitely. It is to make the camp safe enough to perform essential tasks while preserving a clean exit if the situation changes.
If your plan includes collecting materials or improving equipment, prioritize structures that save time and reduce exposure. A focused building reference is available in the guide to early base construction, which can help you connect a defensive layout with the resources required to build it.
Build for the Task You Are Doing
Different activities demand different defenses. A storage area benefits from protection and clear access, while a crafting station needs room to work and a route for leaving quickly. Build around the action rather than placing unrelated structures and hoping they create a useful defense.
| Player Situation | Construction Priority | Practical Reason |
|---|---|---|
| Storing valuable gear | Protect the storage point | Reduces the chance of losing accumulated progress |
| Crafting for an extended period | Cover the working area | Allows safer use of tools and materials |
| Preparing for extraction | Maintain a clear exit lane | Prevents a crowded route from becoming a trap |
| Gathering basic resources | Favor portable protection | Keeps early runs inexpensive and flexible |
| Returning after a difficult fight | Create a safe recovery space | Supports recovery before the next action |
Preserve More Than One Exit
A single exit is convenient until it becomes blocked. Maintaining a secondary route reduces the cost of unexpected encounters and gives you options when the first path becomes dangerous. The Fallback Exit should be plausible rather than theoretical, meaning you could use it without searching blindly in the middle of a crisis.
Keep the route clear and remember its position. If your base includes several structures, make the escape path visually distinct so that you can recognize it under pressure. This simple preparation prevents a location that once felt safe from becoming the place where you lose your entire run.
Avoid Building Too Far from Resources
A well-built base still has limited value if you must spend most of the run traveling to obtain construction materials. Balance defense against access. Early structures should improve your efficiency, while elaborate layouts can wait until you have a stable source of supplies and enough experience to understand how you will use them.
The Construction Budget is the amount of time and material you are willing to spend before pursuing the next reward. Set it before beginning, because a half-finished project can occupy valuable space without delivering a functional benefit. Finish the most useful piece, secure what matters, and reassess.
Fight Only When Fighting Helps
Some encounters have no safe alternative, but others can be avoided. Consider whether the reward justifies the danger, whether your condition allows a prolonged encounter, and whether retreating costs less than winning. The Engagement Threshold is the point where the expected value of the fight becomes lower than the value of preserving your current resources.
A strong defense often means creating favorable conditions rather than winning every confrontation. Use cover, control approaches, and your exit. If the situation weakens, move early. The goal is to preserve future opportunities, not to prove that you can defeat every threat.
GRAVHOUNDS What to Do First During a Risky Run
Even a well-prepared plan can change when equipment breaks, an enemy appears near the exit, or a valuable item sits farther from the route. Knowing what to do first during pressure helps you make these decisions in a consistent order rather than reacting to the loudest immediate threat.
The general priority is to secure your core survival needs, identify the nearest viable escape, and abandon optional rewards when time or condition becomes unfavorable. These priorities remain understandable even when the environment becomes unfamiliar, which makes them especially useful for gravhounds beginner tips and later expeditions.
Protect the Most Important Assets First
Not every carried item deserves equal attention. Identify the few pieces that support your next run, such as essential protection, a reliable weapon, extraction supplies, or materials needed for a specific upgrade. Those form the Core Asset Set. If carrying them creates an emergency, use every available option to preserve them.
Less valuable items become acceptable losses when they compete with the core set for attention. This does not mean abandoning good equipment without cause. It means recognizing which loss you can absorb and which loss would seriously damage your next opportunity.
Identify the Fastest Route to Safety
When pressure rises, stop collecting and evaluate the nearest viable route. The safest available path is not always the one with the most cover or the shortest straight-line distance. Consider obstacles, recent activity, your condition, and whether you can move through the area without spending additional supplies.
The Immediate Escape Plan should identify your next landmark, the reason you chose that route, and the action you will take if it becomes blocked. A secondary direction helps because danger often shifts faster than expected. This planning turns a vague intention to leave into a route you can execute.
Use Supplies Before They Become Useless
Recovery items are most useful while they can still change the outcome. Using one at the correct time preserves mobility and decision-making; saving it until movement is impossible wastes its value. On the other hand, using a supply unnecessarily wastes an important reserve, so timing matters more than aggressive consumption.
| Condition | Best Decision | Reasoning |
|---|---|---|
| Minor damage with a safe route | Preserve some supplies | The route remains manageable |
| Rising damage and a longer return | Use recovery early | Movement may determine whether you escape |
| Open route but adequate condition | Keep moving | Time may matter more than treatment |
| Blocked direct path | Use an alternate route | Avoid forcing a dangerous detour |
| Valuable but optional loot nearby | Leave it | Optional rewards rarely justify a major risk |
Know When to Abandon a Run
Abandoning a run is not the same as failing. If your equipment or condition makes extraction unrealistic, leaving the remaining rewards behind can preserve your progress for the next attempt. The Run Sacrifice becomes sensible when your chance of returning safely has fallen below the value of the loot you would risk.
Ask whether the remaining objective can still be completed without consuming most of your resources. If the answer is no, turn toward extraction. Players who protect their core equipment gain more consistent long-term progress than players who repeatedly chase one additional item after the run has turned against them.
Finish With a Clean Recovery Routine
Your actions after extraction shape the next run. Organize the recovered items, repair or replace what you can, and identify the most valuable improvement available. Avoid making a large purchase without considering travel time and the defenses you still need. The Next-Run Upgrade should address the clearest weakness rather than merely look impressive.
A simple review is enough: what helped, what failed, and what one change would make the next attempt more effective? Community experience suggests that short, repeated reviews are more useful than elaborate systems, because they create a practical record instead of a theoretical plan. If frame rate or input delay interferes, the performance tips guide can help you address that separate obstacle.
A Repeatable Early-Game Routine
The simplest way to remember what to do first is to treat each run as a sequence of decisions. Confirm the job, choose a route, collect essentials, protect the exit, and extract while the opportunity remains. This sequence keeps your priorities clear without requiring perfect knowledge of every map detail.
| Run Phase | Main Decision | Success Condition |
|---|---|---|
| Deployment | Where should I begin? | The landing supports the job |
| First minutes | Which objective matters most? | One clear goal is selected |
| Mid-run | Which items improve survival? | Gear serves a practical purpose |
| Late run | Is the reward worth the risk? | The exit remains accessible |
| Extraction | Can I return safely? | Core assets reach safety |
| Recovery | What should improve next time? | One clear upgrade is selected |
Keep the Routine Flexible
The routine is a decision framework, not a fixed route. A safe route may become dangerous after an encounter, and a low-value item may become essential if your primary weapon becomes unusable. Change course when evidence changes, but do not change direction simply because a new reward appears.
The Priority Order should remain stable even when details change. Survival comes before optional loot, the active exit comes before distant opportunity, and repeatable routes come over one-time detours. These principles make your decisions understandable and help you learn why a run succeeded or failed.
Learn One Lesson per Run
Choose one question before a run and evaluate it afterward. Did you extract too slowly? Did you carry too much? Did the job route conflict with the exit? Because changing one factor at a time makes cause and effect easier to identify, your skill improves more quickly than it would through random experimentation.
The Run Review Note can be extremely brief. Record the route, the outcome, and one adjustment. These notes also help you identify recurring patterns, such as consistently overstaying near distant loot or choosing an exit that passes through active danger. Over time, the review becomes a personalized set of reliable rules.
Progress Through Useful Upgrades
Prioritize upgrades that remove a repeated problem. More carrying capacity can reduce overpacking, improved protection can reduce fear during a route, and a reliable weapon can make encounters less costly. An upgrade earns its place when it changes your routine for the better.
The Repeatable Benefit Test asks whether the item or knowledge will help on several future runs. If the answer is yes, it deserves priority over a reward consumed only in the current encounter. This approach creates a dependable foundation before you chase more demanding goals.
Keep the Sequence Consistent
Consistency makes mistakes easier to detect. Use the same decision order even when a particular job is unusual: establish the objective, identify the exit, acquire essentials, and reassess the risk. If an emergency forces a different action, you will understand why you departed from the plan and can adjust the standard routine accordingly.
The Decision Chain is therefore more valuable than any single route. It helps you recognize a bad situation before it becomes a lost run, and it gives you a repeatable answer to the question of what to do first in GRAVHOUNDS. The best beginner player is not the one who avoids every mistake; it is the one who recognizes changing conditions and responds early.
Frequently Asked Questions
What should I prioritize when starting GRAVHOUNDS?
Prioritize your job, a practical landing area, and a known extraction route before collecting optional valuables. The best early loot is what you can carry home. Once your core equipment is secure, you can use spare runs to gather materials, test alternative routes, and improve the camp.
Is it better to explore or complete jobs early?
Jobs generally provide clearer rewards and teach the game’s main loop. Exploration still has value because it reveals routes and landmarks, but keep it controlled. Choose one short exploration objective near your exit, then return to the job or extraction plan before another detour.
How many items should a beginner carry?
Carry only what improves survival or supports the current objective. Extra valuables become a burden because they slow movement, increase losses, and encourage riskier routes. Replace weak equipment instead of collecting several items that serve the same limited purpose.
Should I build defenses before going on more runs?
Build a simple shelter, storage protection, and a clear exit before expanding. A large base is less useful if your first job cannot fund it or if basic security remains incomplete. The early construction guide can help you set priorities.
When should I abandon a run and extract?
Extract when your condition, time, or route makes the remaining reward unreliable. Losing optional loot is preferable to returning empty-handed after every run. Before leaving, identify the fallback route, preserve your core equipment, and resist changing plans for one distant item.